Build A Real World Beautiful Web APP with Angular— The Ultimate Guide — PART II


This is part 2 of the series we started around building Minimus, the weather app built with Angular. It took this long to release the second part because I have spent the last year working on a new productivity tool startup. I created Raya.io for multiple reasons that I explained in depth my last blog post: Why I ditched Slack & Asana and I created my own minimalist software?
️Tutorial Part 1️⃣:
Why This Series ❓
I remember back when I was starting to learning web development that I have always wanted to see someone that is able to demonstrate how to build something real, something useful from start to finish and this is the kind of tutorial series I wish I found when I got started.
I remember freaking hating those separated pieces tutorials (Angular routing, Angular route guards, Angular services…) I just want the whole package and the whole picture in one place! and this is one of them! so let’s get to work!
before I start I want to remind those who didn’t check part I, to click here and come back later to continue with part II.
What this part will cover ❓
This part will be the final part of the series as I don’t want to break apart this tutorial into a gazillion parts which could get boring easily so I decided to do a lot of things today and end the series here.
However, this will not be the last app we will build as I am planning to release more in-depth real-world apps tutorials so if you want me to notify you when they come up you can signup to my newsletter here. 💌
Our to-do list for this part:
- 📱 Mobile friendly and fully responsive
- 🐦Twitter API Integration
- 🔥 Firebase Authentication and Firestore (using AngularFire Lite)
- 💯 100/100 Lighthouse PWA score
- 🔎 Server Side Rendered (SEO)
- 🐞 A ton of bug fixes…
Step 1️⃣ : Fixing Bugs / Refactoring

The most important thing to take away here other than fixing the following bugs is that no software is perfect and fixing bugs is an essential part of web development. At this stage, there will be a ton of flaws and bugs but remember to always to think about shipping a minimum viable product (MVP) as fast as possible.
Updating to Latest Angular ⏫

If you initially followed the first part of this blog post series you should have an older angular project so this is how to update it to the latest Angular version. It is going to be easy as there were no breaking changes that affect the app’s old code because we didn't use any `ViewChild` directive and we have not created any lazy loaded modules.
just run the following command and that should take care of updating your angular project.
ng update @angular/cli @angular/coreBut I prefer that you manually update the package.json file and reinstall all of the dependencies using npm install so we can have exactly the same dependencies versions.
A preferable but small modification to consider if you are manually updating your project is to remove all the old imports of services inside app.module.ts and let angular register each service globally by adding the provideIn: ‘root' property inside eachInjectable decorator at the top of every service file.
@Injectable({
  providedIn: 'root'
})
by the way one of the best resource to check out when updating any Angular project is the following official docs page: https://update.angular.io/
Refactoring the weather service 🔧
the old weather service had an unnecessary duplication of functions which caused a lot of subscriptions on the component side so I have instead merged all of those functions into 2 only and to avoid memory leaks I used the first RXJS operator.
getWeather(): gets the current weather of the city passed in as a first parameter
getForecast(): gets the next 5 days weather forecast of the city passed in as a first parameter. If you are still getting your head around the meaning of observable think of them as a constantly updated normal JavaScript array and to make the concept easier to grasp just look at the piped RXJS operator map it has the same effect of a standard map function used on JavaScript array.
Adding missing light version illustration ☀️

for some reason, I have forgotten to add the light version of the city illustration inside the add-card.component.html but here we go, just paste the SVG code exported from illustrator(found in GitHub repo) and add an *ngIf directive to show it when darkMode is not active.
Adding missing weather state icons (Haze & Fog) 💨

when I designed the icon pack for the different weather states I forgot to create an icon for the Haze and Fog conditions which resulted in an empty weather card in case the weather corresponded to on this states. Here is the icon to add to the pack and of course we should add another *ngSwitchCase inside the template to correctly show it.
Refactor the weather card to reuse it in add city page♻️
as we are going to add a new page to our app later that the user can use to add new cities to the home page. I thought of reusing the weather card as a search result card and by adding a Boolean value as a prop that the parent component could easily pass in to control the appearance of the card depending on the context where the card is used.
so to mark the addMode as a prop that gets passed in we add @input decorator in front of the variable. The same thing goes with city variable, however, we want to fetch the weather conditions of the city passed in as a string from the parent component and to achieve this we decorate a function with @input instead of a variable so that the function gets triggered every time a new city is passed in.
Inside each subscribe method call you can see that I am using standard JavaScript methods like Math.round to format all the data inside the component before it goes to the template which is a choice I made in order to keep the WeahterService as simple as possible this way I can keep its sole purpose to return the raw data from the API… just in case we need to reuse the service in another context inside other components in the future.
as we have moved in from the terrible pattern where the weather card component does everything on its own, we should update the parent component HTML home.component.html to utilize the new input props
<app-weather-card *ngFor="let city of cities | async;" [city]="city?.name"></app-weather-card>Step 2️⃣ : Additions & New Features
starting from minor design additions to new major functionality features:
Illustration 🎨
in the last part of this tutorial I created illustrations for 4 cities and this time due to limited time allocated for this project I have designed only one more and it is for the famous Hassan Tower located in Morocco’s capital city Rabat:

making all illustrations for each city will be super cool and the app will look awesome but obviously I can’t make them all alone so if you would like to add an illustration of your city don’t hesitate to open a pull request on the repo.
I am thinking also of making some tutorials showing how I created such illustrations so don’t miss it: signup to my newsletter here. 💌
CSS Animations 🎭
as the user navigates between pages in the app its important to use animations to indicate continuity between the different parts of the app.
It would be much more impressive to orchestrate a seamless animation using JavaScript (using the GSAP library for example) but for the sake of simplicity, I have used just CSS animations which will get triggered by default when each component gets mounted.
first, for each animation, you should define how the different CSS proprieties (we will use only transform and opacity for optimal performance) values will change over time and we do it inside a @keyframe block.
You could use the from keyword to mark the start and the to keyword to mark the end of the animation or you can also use percentages for more granular control. (example: 0% {...} 50%{...} 100%{...})
After you define all the animations its time to use them. inside the target element, CSS selector add the following property
animation: slideup 1s ease-in-out, fadein 1.25s ease-in-out 0s 1;the animation property takes as parameters:
- the name of the animation keyframes we defined earlier as the first argument (slideup, fadein….)
- how long the animation should take (1s, 2s ….)
- the timing function which defines how fast or slows the animation movement involves in terms of time (ease, ease-in, ease-in-out…)
- initial delay before the animation starts (1s, 3s,4s…)
- iteration count which means how many times the animation will repeat (infinite, 1, 5,10…)
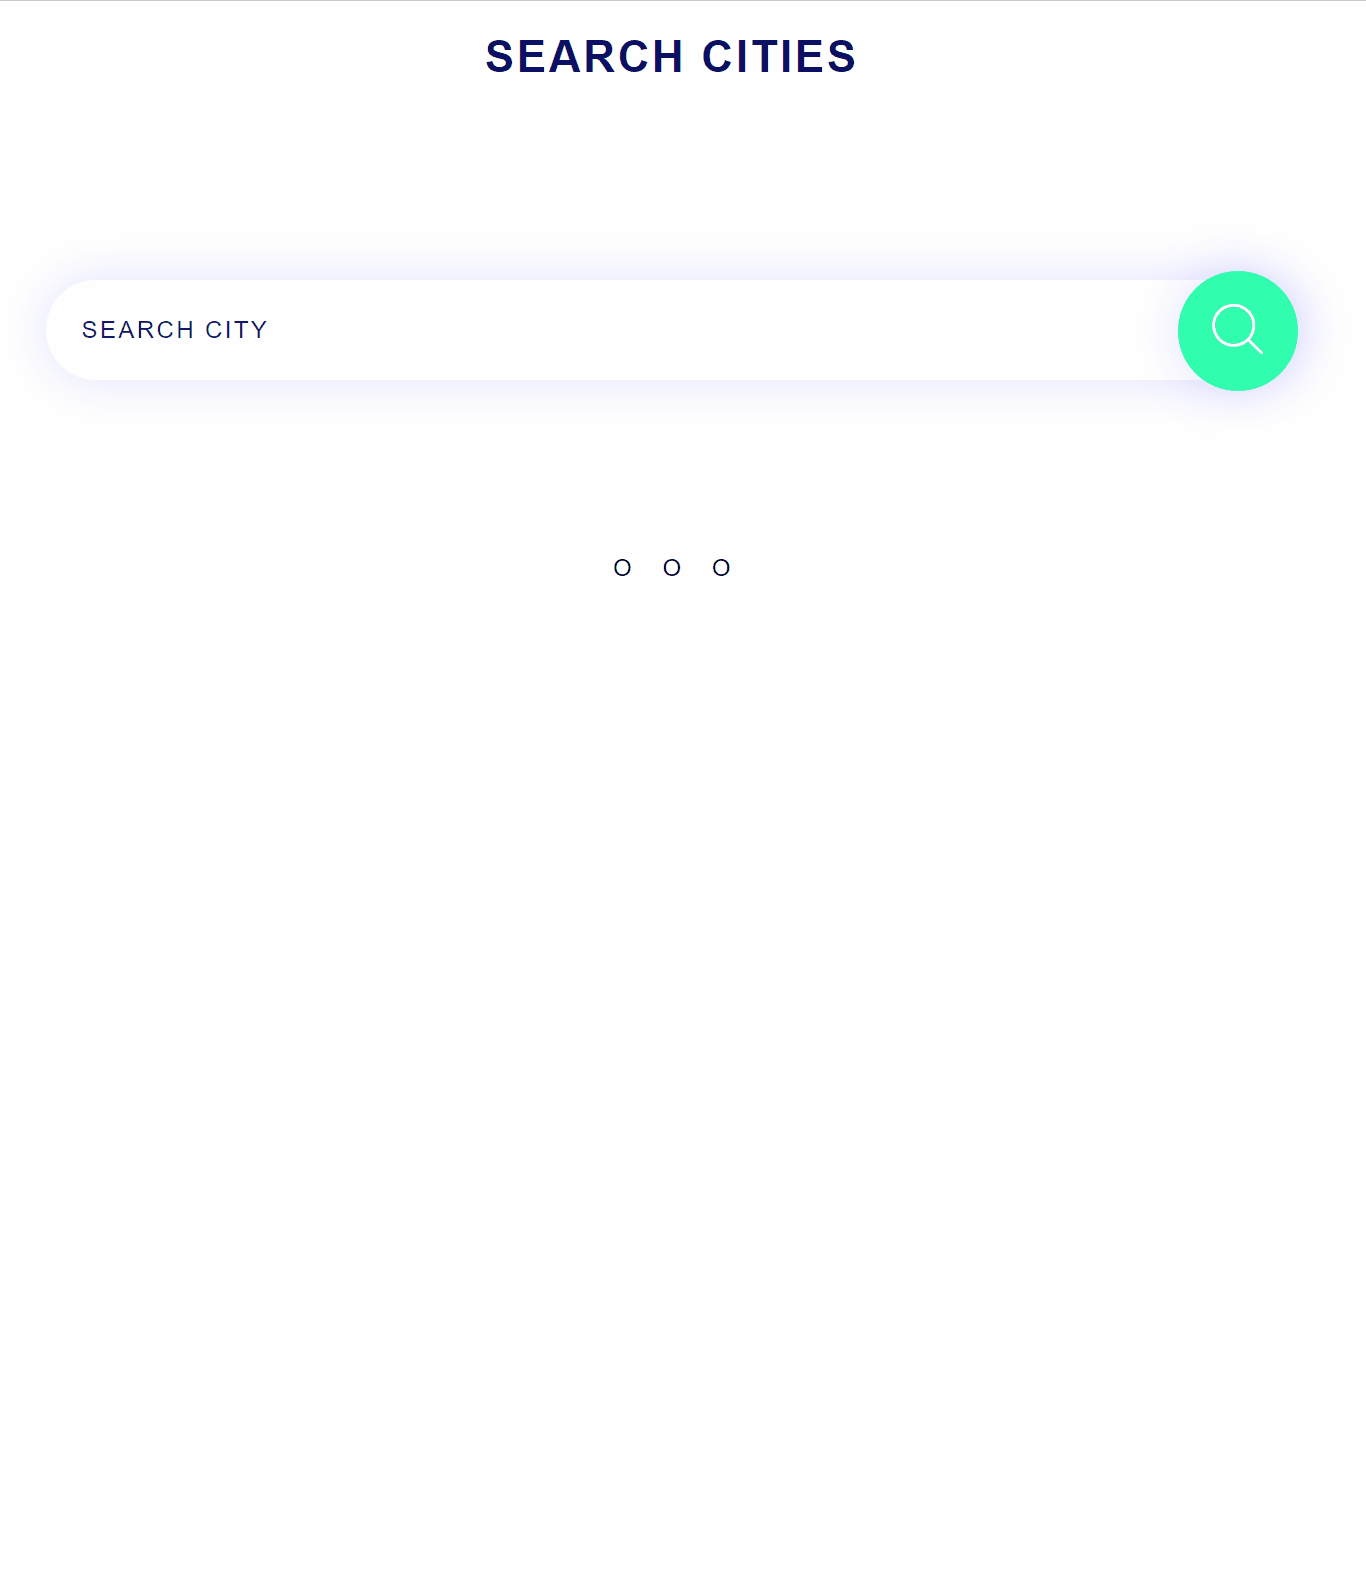
Add city page 🏨

Again the main feature for users is the ability to add their favorite cities so they can easily see and track their temperatures on the home page.
Firebase Service:
Before we dive into any HTML or CSS we should set up a service that the “add component” will consume in order to write to the Firebase Firestore database for which cities the user decides to add.

Create a new service for Firebase and call it fb.service.ts or you can just run the CLI command: ng g s services/fb/fb
import AngularFireLiteFirestore from angularfire-lite and inject it in the constructor. Then create a new function called addCity(cityName) which will use the AngularFireLite write function to write to the database inside the document uid/cityName. As we are creating the function that will write to the database I thought of the Home component that will fetch this data when the user logs in so I let’s create also a function to read the cities that the user added and call it getCities()
Note this.auth.uid() is used from AngularFireLiteAuth service to retrieve the currently signed in user ID (will cover authentication later in this tutorial)
Add City Component:
let's start with the layout and here I thought of having a search input and next to it a place to display a featured city that the user can follow (I chose Rome here for example but you can easily make it random and fetch an image of each city using Unspalsh free and public API).
going through the major parts of this HTML line by line: 👊
line 1: just a wrapper for the entire HTML component
line 4: main card wrapper
line 8: wrapper for the left part of the card (search section)
line 10: card left section header wrapper
line 11: card left section title
line 12: card left search input wrapper
line 13–17: card left search input with 2-way data binding using [(ngModel)], (keyup.enter) event to search for the city when the user hits the enter on his keyboard, auto-complete directive to instruct angular to use the library @ngui/auto-complete, [source] to feed the library with auto-complete options available to the user that we will fetch from an api and store inside a variable holding all the capital cities
line 18: simple button with a click event listener that will trigger our city search function
line 19: search icon inside the button
line 28: card left body where the searched card will appear
line 29: a notice text in a span with conditional *ngIf to show it only when its needed
line 30: reusing the app-weather-card component to show the city that the user searched and we pass in all the necessary props in order for the component to properly render the city.
the left card section:
the autocomplete component functionality is imported the @ngui/auto-complete library and before we cover the right section HTML make sure to do a quick npm install @ngui/auto-complete and then import its module inside the imports array of app.module.ts like so:
import {NguiAutoCompleteModule} from '@ngui/auto-complete';@NgModule({
   ...
  imports: [ NguiAutoCompleteModule ...],
   ....
})
now let's tackle the card right section
line 38: card right section wrapper
line 40: card right section background image (using absolute positioning)
line 44: card right section header wrapper containing a simple h3 tittle, a small text wrapped in a span and hr tag as a visual separator
line 50–115: card right section body section containing an svg at the top to display the weather conditions of the featured city (in this case Rome) using the *ngSwitch directive and at the bottom we find simple interpolation to display the {{ temp }}variable in order to show the city temperature in the template(HTML)
and now let’s jump to the component CSS
If you are still not used to large Angular components you might think that around 600 lines of CSS are overwhelming but honestly, this is nothing and the CSS above is pretty easy as most of the proprieties are self-explanatory and repetitive but still…I will go through some of them quickly with you:
- we used flexbox by setting the display property to
flexand we usedjustify-contentto move the content on the horizontal axis andalign-itemson the vertical axis (if the flex-flow is set to column the axis flip) - margin or padding are used to create a space around an item
color / background colorused for setting the text and background colorborder-radiusused to make the borders roundedoverflowused to control how the browser deals with content outside a div for example (hide it or show scroll bar and allow the user to scroll)letter/word-spacingused to increase the space between the letters or words. this trick is used in design to enhance readability or drive emphasis to a text (Text Kerning)box-shadowused to add a light shadow behind a div and make it look like a card
📱 Making It Responsive + Generating Media Queries
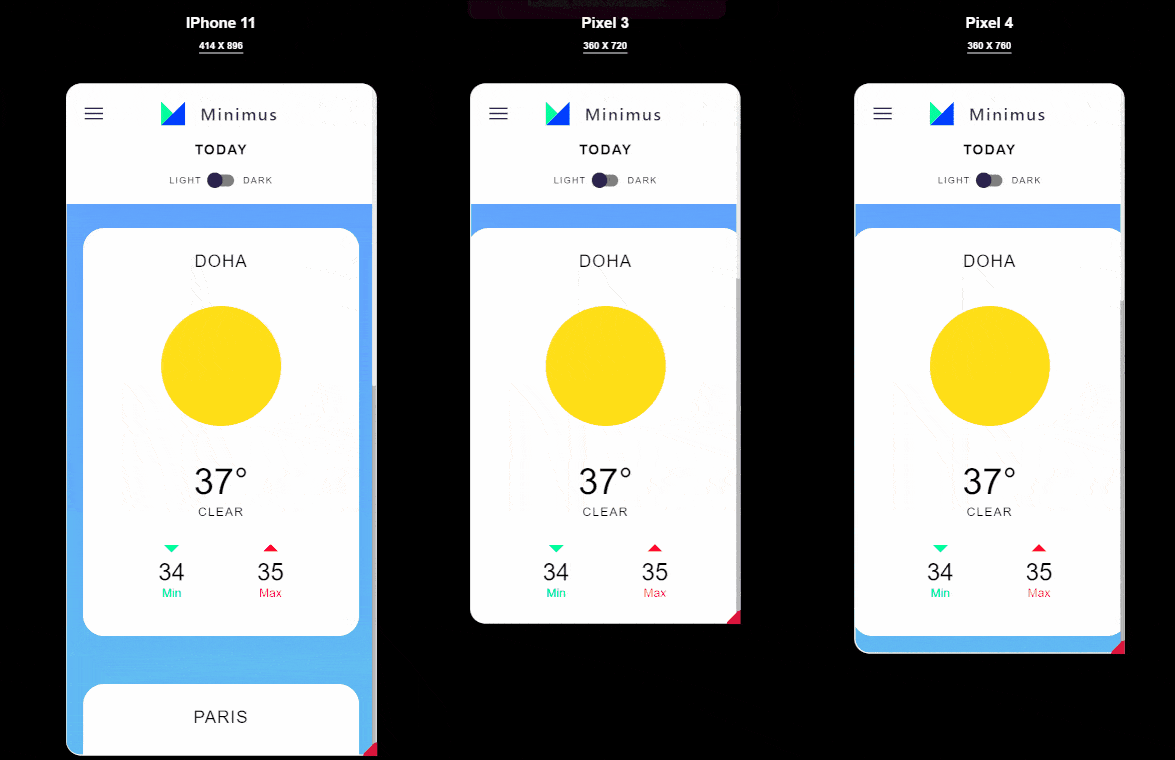
as you can see in the last part of add.component.css most of the CSS is wrapped within a media queries which looks something like this
@media screen and (max-width:1919px) { CSS goes here… }
basically these means do not apply the CSS inside the brackets unless the screen is smaller than `1919px` but the question is how did you know which screen size to use. well, every app is different and there is no rule other than testing which works best.
you can resize the browser to find out the perfect media query size but I personally find resizing and switching back and forth between the code editor and the browser is tedious and time-consuming so I use intab.io (but you don’t have to) a browser extension I created to test and generate media queries for various mobile/tablets sizes. It is just a faster way to test and make a website responsive.
🧪 you can test it live — no sign up required at intab.io
Now moving on to the component logic in add.component.ts
at the top, we import everything we need from the Angular HttpClient & both the WeatherService and FbService then we inject them in the constructor.
if you are still not familiar with the different component life cycle hooks, they simply function that fire at specific points of time during the life of a component. For example, ngOnInit() will fire when Angular initialized the component and this is the best place to make any HTTP calls. on the other hand, ngOnDestroy() will fire just before the component gets destroyed (removed from the page) and it is the best place to unsubscribe from any ongoing subscriptions we made during the component initialization to avoid memory leaks.
ngOnInit breakdown:
line 30–33: calling the getWeather function found inside the WeatherService to get the weather conditions of the city the user searched for and storing the temperature and the weather condition inside the appropriate variables (temp & state)
line 35–42: using the HttpClient to call the “resetcountries” API which will return to us a list of all cities that we will use to feed the search autocomplete input with it. ( no need to unsubscribe here because it’s a one time call and piping the RXJS first() operator helps us to do so)
line 44–51: calling the firebase database to check if the user has already followed the city of the month to conditionally display (Followed or Follow +) inside the button as well as change the button style using [ngClass]
<button> {{followedCM ? "FOLLOWED" : "FOLLOW"}} </button>functions breakdown:
selectCity: this will get executed when the user hits search and basically here we check if the city name is valid (a capital city) then we show the add city card otherwise we toggle a Boolean value to show a warning note to the user
addCityOfTheMonth: calls the addCity method found in fb.service.ts to add the city of the month inside the user collection of cites stored in Firebase Firestore database.
ngOnDestory: just calling unsubscribe on the ongoing subscription in the component.
Step 3: Authentication Using AngularFire Lite 🔥

Installing AngularFire Lite 🔑
- run the following command:
npm i angularfire-lite - store your project firebase config inside
enviroment.ts
config: {
  apiKey: 'xxxxxxxxxxxxxxxxxxxxxxxxxxxxxxxxxxxxxxx',
  authDomain: 'xxxxxxxxxxxxxxxxxxxxxxxxxxxxxxx',
  databaseURL: 'xxxxxxxxxxxxxxxxxxxxxxxxxxxxxxxxxxxxxx',
  projectId: 'xxxxxxxxxxxxxx',
  storageBucket: 'xxxxxxxxxxxxxxxxxxxxxxxxxxxx',
  messagingSenderId: 'xxxxxxxxxxxx'
}
3. add the following line to your app.modul.ts imports array
AngularFireLite.forRoot(environment.config)Auth Service 🔒
I could have here imported angularFireLite directly in the components that need access to firebase auth but I prefer to keep everything related to firebase in a single service that we already created fb.service.ts .
open up the service and make sure to import AngularFireLiteAuth from ‘angularfire-lite’ then we basically will need 3 simple functions:
- isAuth: will return the user authentication state
- signin: takes a 2 arguments which are the user email address and password and sign-in the user
- signup: will take 2 arguments also and will signup a new user using firebase email and password method (don’t forget to enable email/password method in your project dashboard in firebase)
if you are new to RXJS and you don’t quite get what switchMap does. It is just like flatMap which I explained with simple terms in my answer at Stackoverflow but the only difference is that SwtichMap completes the previous Observable instead of keeping it alive.
Route Guards 🚦

Create the following folder structure. You can also use the CLI to generate the two new guards boilerplate using: ng g guard auth and ng g guard app

Why we need these files?
to prevent unauthenticated users from accessing our core app routes (home/add city…) and on the other hand to prevent authenticated users from accessing our auth routes (signin/singup…) we will need to use what angular calls “route grads”…. I really hate to use too much terminology because this what makes things look extremely complicated for beginners when in fact these so-called route guards are basically just like any service but they contain a function called canActivete that fires when the user navigates between routes and depending on a Boolean value it allows or denies access to a route and we can also use it to redirect the user to right page using the standard angular router and that is it!
we use the isAuth() function that we created in the fb.service.ts to check if the user is logged in and then we return true to let the user in or we redirect his using router.naviate to the login page.
on the other hand, the exact opposite will happen with the auth.gaurd.ts
now to make them functional make sure to assign each guard to the appropriate route inside our routing module app-routing.module.ts and the new routes array should look like this:
Auth Components
now to consume the methods we defined in the auth service we should create the login and the signup components.
Login component

Its really important to stay consistent by following the same design patterns through out the app and the login page is no exception. We have a floating master card separated into two parts, on the right we show a dynamic image that changes on each refresh that gets fetched directly from Unspash public photos API. On the left we have the standard email and password inputs but with blue drop-shadow to draw the attention to them. the login button is disabled by default and will get enabled only when the user enters the email and password.
line 1: component content wrapper
line 2: master card wrapper
line 4: left section container
line 5: left section title
line 8–14: template-driven login form containing two inputs of type text and one input of type submit (login button). (ngSubmit) event is bind to the login method on the component that will get triggered when the user submits the form. All of the validation is done using standard HTML attributes (required, type,
I have included the CSS here for reference only and I don’t think any further explanation is necessary as its super repetitive stuff (flex box, text color, background color, margins…)
one thing to point out the link to the background image from Unspash of the right section is used in the background property of .login-aside
background: url("https://source.unsplash.com/random/1200x900?mountain") no-repeat center center;url: pointing to Unspash public API URL passing the image size(1200x900) and search keyword(mountain) as query parameters
no-repeat: avoid duplicating the image to fill the .login-aside div
center center: centering vertically and horizontally
Signup component
the signup component is nearly an exact copy of the signin component with only 4 minor changes:
- all CSS classes refactored to start with
signupinsteadlogin - Welcome text says“ Join Minimus Today” instead of welcome back
- form submit button triggers a call to signup function instead of login
- header text says “Signup ” instead of “Login”
I know a better pattern here would be is to create a common auth component that could be used for signup and signin in the application in order to avoid code duplication but I wanted to account for potential future changes in signup process so most probably the two components will end up looking very different from each other but for now at the MVP stage we want to strategically cut corners to ship faster but without affecting the user experience. Building an MVP does not mean to ship a catastrophic and super crappy version of your software!
for reference: signup.component.html
for reference: signup.component.ts
Error Handling 🚨
every application should have some sort of a way to inform the user if something wrong happens or an error gets triggered that why should generate an error component
ng g c ui/errorour error component will be a snack bar that will popup at the bottom of the page for a few seconds and then it will auto-hide.

breaking down the HTML
<div class="error-wrapper" [ngClass]="{'error-wrapper-active': message}">
  <span class="error-message">{{message}}</span>
  <button class="error-btn">{{action}}</button>
</div>
we have here a single div that will wrap the message with an action button: div is intentionally hidden but with [ngClass] will conditionally show the div with a translate transition. both the span and the button text will be showing the dynamically updated variable found in error.component.ts using an interpolation {{ variable }}
Nothing special again on the CSS side, other than using position fixed so the snack bar shows at the bottom of the window no matter where it was inserted in the template. Just in case: a high z-index value was used to make the card overlay any other object. You can see that the .error-message class uses the text-overflow: ellipsis property which is not common but it's used to make any overflowing text gets replaced with three dots ( … ) if the error message provided to the component is very long.
inside the error.component.ts we will the boilerplate as it is but we should just add the two input variables that I already mentioned (message and action) at the top.
@Input() message: string;
@Input() action = 'GOT IT';
to use the component we simply add it in each parent component template passing in a variable that will contain any string-based error message
<app-error [message]="errorMessage"></app-error>Step 5: Twitter API Integration

Before I start with the twitter API integration I want to give a shout-out to Twitter for how truly ridiculous and developer unfriendly their API is. First of all, it took ages for my API access request to get accepted and although I have provided all the necessary information upfront they still asked me repeatedly about why I am requesting access to their API which by the way truly sucks in terms of ease of use and functionality. Good luck trying to figure out where the API authentication docs are located or why unnecessarily complex the auth process is!
Moving on now to the actual integration: we will utilize Firebase Cloud Functions as the API authentication and call to retrieve tweets should happen server-side.
start by initializing cloud functions in your project with the following command: firebase init functions

after that, you will notice that firebase-tools CLI generated a functions folder containing the necessary boilerplate including an index.js file that will hold our actual nodejs code.
before we dive into the function we will create we need a couple of dependencies
"twitter": "^1.7.1",
"dotenv": "^7.0.0"
the twitter library from NPM will help us connect to the API more easily as doing it from scratch is a waste of time.
Dotenv will be used here to store all of our twitter keys as environment variables inside an .env file instead of embedding them directly inside index.js
so here is our .env file containing all the twitter keys (just replace placeholders with your own keys from twitter developer dashboard)
now let’s move on the actual Firebase cloud function that we will call later from our Angular front-end
line 1: we import firebase-functions (required by cloud functions to work)
line 4: we import dotenvand we call the config method to register all the variables stored inside the .env file as node environment variables
line 11: we define the tweetscloud function as a callable https function
line 13–19: importing and initializing the twitter library by passing in all the required keys.
line 20–32: calling search/tweets API endpoint passing in the query parameters (q for search query | count for how many tweets we want the API to return to us) and resolving the promise when the tweets get returned otherwise reject promise and log the error.
now let's get back to our angular application and generate a new service that will call the cloud function and get the tweets
line 2: importing angular built-in client to make HTTP calls to our cloud functions
line 3: importing RXJS Operators that we will pipe into the observable returned from the calling the HTTP client.
line 10: injecting the HttpClient into the constructor (the http variable now will give us access to all of the Angular HttpClient functions)
line 12–29: defining the fetchTweets method that will make a post Http request to our cloud function passing in the data object containing our tweets search query. The map operator is used just like the map function on the array to modify each element of the array. the same thing goes for the filter operator where I used it to remove any tweets that do not contain the word weather as the Twitter API returns most of the time unrelated stuff.
Step 4: 100% PWA & Server-Side Rendering
Angular has made it so much easier to generate a service worker using the Angular CLI PWA command which by the way you could find it alongside all the other Angular ecosystem ng add commands in ng-add.web.app/

copy the command with a click and just run it inside it command line, its easy as that!

after that you will notice a couple of files added/updated in your project:
ngsw-config.json you can configure here the service worker behavior that Angular will generate
assets/icons folder: make sure to change all the icons with your logo but with keeping the same sizes
Testing With Lighthouse (100/100 PWA score)

for testing will be using google lighthouse which you can access in chrome by pressing F12 and then going the audit panel to check Minimus PWA score and as you can see “mission complete!”
Server-Side Rendering

The Angular CLI introduced also an ng add commnad to generate Angular Universal boilerplate that enables you to server side render your app
ng add @nguniversal/express-engine — clientProject minimus
running this command should build your server bundle and run the node express server on port 4000
npm run build:ssr && npm run serve:ssrif you want a more in depth explanation of SSR check my old blog post:
and most importantly the angular universal docs
To Wrap up
I have tried to cover everything on this tutorial series, I hope you find it educational and useful. I should leave now with the final result to check it out on your own:
Live Demo (V2): https://minimus-weather.web.app
Github Repo: https://github.com/hamedbaatour/Minimus
As I said this will not be the last tutorial and there will be many more just like this one showing you how to build real-world apps so be sure not to miss them by subscribing to my personal email list:
you can also follow me on Twitter @hamedbaatour in the meantime where I tweet about some cool front-end development stuff. and one last piece of advice…
Become an Angular Master

The best course to take in order to familiarizes yourself with the entire Angular ecosystem as you will use popular libraries in building an entire application (includes state management using NgRx too):
Angular (Full App) with Angular Material, Angularfire & NgRx. Rating:⭐️⭐️⭐️⭐️⭐️